
How To Take Incredible Landscape Photos With Your iPhone
Improve Your iPhone Landscape Photography With These Tips
Since we originally published this piece about improving your iPhone landscape photography, much has changed in the world of iPhones. Back in October 2017, the iPhone 8 was recently out and the iPhone X wouldn't be available to consumers for several weeks. The iPhone 7, then a year old, was the first iPhone to feature multiple, rear-facing camera lenses, with one 28mm wide-angle lens and a 56mm telephoto lens. However, it was the iPhone 11 Pro's release on September 20th, 2019 that upped the number of rear-facing lenses to three, calling Apple to declare, "We've three-upped ourselves."
But like the iPhone 7, the move to three lenses isn't a superficial one. There's real purpose to each lens, and each set of optics provides a distinct view that makes capturing various images on an iPhone easier than ever. There's the ultrawide lens, with a 13mm focal length, a wide lens, with a 26mm focal length, and a telephoto or zoom lens, with a 52mm focal length.
The curious bit is that the iPhone 11 Pro's three lenses almost perfectly matches the three lenses in our ultrawide, wide and macro lens -- indeed, it looks like we were right with this three lens idea (Apple's still missing a macro), and it's becoming obvious that one lens isn't really adequate for the various types of photos anyone is likely to take over the lifetime of their device, particularly with regard to iPhone landscape photography..
The key here is that when you're out and about, a field of view that is suited for portraits -- let's call this the iPhone camera default -- doesn't really work when you're trying to capture breathtaking and expansive views. Anyone who's tried to snap a quick pic at the top of a mountain or of a gorgeous open meadow can attest to how small and claustrophobic everything looks -- there's nothing wrong with your phone, it's the lens you're capturing it with.
Apple understands this, and touts their new ultrawide lens as allowing "four times more scene than ever" to help capture "mountain ranges, soaring cathedrals, and iconic skylines."
But if you don't have a new iPhone 11 Pro, or $1,000 to buy one, we've got the next best thing, and you don't even need an iPhone to use it. With our new OneClip, you can attach one of our three creative lenses to any mobile device and instantly get a wide, ultrawide or macro look, in addition to your phone's native optics. If you already have an iPhone, you can pick up one of our photography cases to add native lens functionality without the added bulk, and you'll also get some rugged protection that just might save your phone the next time you have a careless moment. The best thing is that our lenses are constructed from anodized aluminum and are waterproof, dust-proof and snow-proof, as well as scratch-proof and drop-proof. They're also tiny and light, so you can bring them with you everywhere, even in a pocket or bag.
So what are you waiting for? Pick up our lens kit to get a little taste of the iPhone 11 Pro without the big hole in your wallet. Your iPhone landscape photography will thank you.
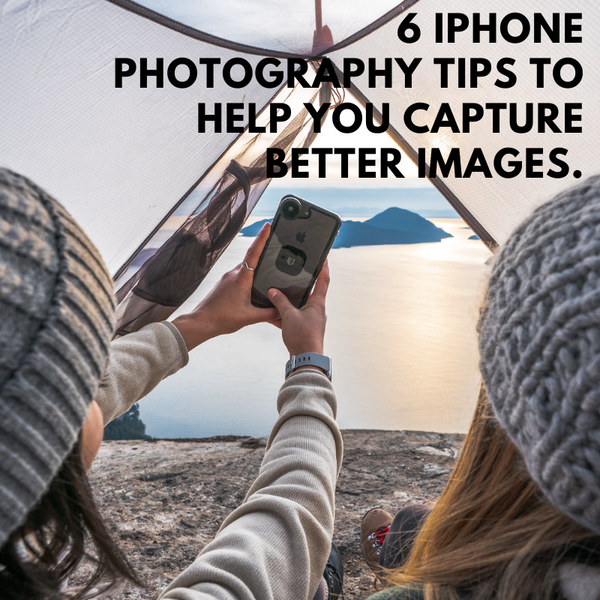
Making memories is simple, but capturing those memories in a way that can convey the same feeling as when you were physically in the moment is hard. There's nothing worse than showing your friends photographs from your latest trip and having to say, "You honestly just had to be there."
While we've all probably experienced this, those of us with iPhones are a lot luckier than the rest. With iPhone, you're able to distance yourself from the pack and take perfect landscape photographs, every single time.
In order to completely take advantage of the tried and tested landscape photography techniques — you have to understand that whatever you shoot will oftentimes look ‘meh’ if you're not taking care of the basics.
Basic number one; what are you focusing on when you shoot the scenery?

Most iPhone landscape photographers make the mistake of only focusing on the house in the distance, or the wheel of straw surrounded by a horizon of grass, or the mountainscape way in the back, but what about the objects in the foreground? You need these objects to create scale, which simply means that without a smaller object in the foreground, the mountain loses its majesty, aka the mountain loses its scale.
Many DSLR camera photographers are fortunate because tripods are built with mounts that will readily accommodate their equipment, but when an iPhone Photographer wants to take the same focused, buttery images, there's a bit of a struggle, which is why we designed the Tripod TiltR below (attaches to any tripod).

The StickR mount rotates a full 360 degrees and tilts 180 degrees for almost infinite mounting angles, making it automatically easy for you to stabilize your iPhone and gain a better perspective of what the shot will look like without estimating. It's adapted to fit any flat surface and an edge, so you can fine tune its position in any way.
With this very simple iPhone mount, you can instantly elevate your iPhone landscape photography by giving it a foreground, a middle ground, and of-course the piece-de-resistance, a background in the horizon. This is much more interesting than just having one massive object in the background!
"But how are you expected to fit all of this into a single shot?" You ask?
We hear you, and we've got an almost too simple solution for that conundrum as well. The Hitcase Wide Lens and SuperWide Lens are both a great choice, depending on what your needs are. If you want to fit as many objects as possible in the frame, the SuperWide Lens is the obvious best choice and prevents you from losing any information in your shot. The Hitcase SuperWide Lens also has the most buttery depth of field which will instantly elevate your shots making your iPhone landscape photographs comparable to DSRL quality.

Once you've got the equipment on deck, the only thing that's missing is proper technique...
Tip #1: Composition is Key - use this simple composition guideline to take better photos
When photographers talk about composition, they're referring to the position of subjects in your photograph. In iPhone landscape photography, the go-to is shooting with the "diagonal principle" in mind.
When landscape iPhone photographers speak of balancing their photographs using the diagonal principle, they're positioning the important subjects at a diagonal from one another in order to balance the photograph both horizontally and vertically. This prevents one side of the photograph from being heavier than the other.
One example is shooting a tree-lined street, a river, or a pier. In each of these scenes, allow the main object (street, river, pier) to run diagonally through the foreground, the middle ground and the background automatically creates depth and interest.

Being in the water shouldn't dissuade you from getting amazing shots either. With Hitcase's Mini Suckr Mount, you can get smooth shots even as you travel at maximum speeds on a boat or a speeding car. This mount attaches to any surface and allows you to shoot or film with confidence that you're getting new vantage points (pictured above).
Tip #2: Shoot in High Dynamic Range
All iPhone landscape photographers worth their weight in gold use High Dynamic Range or HDR for short. The reason is simple; HDR prevents your image from losing essential information and combines multiple exposures so that your image ends up with the perfect exposure without you needing to fuss.
The best part is that HDR is available automatically in the iPhone 8 Plus, however, if you're not there yet fear not because you can still capture amazing images with 3rd party apps available in the App Store. Browse the store and pay attention to the reviews, there'll be an app that speaks to you!

Whatever happens, no matter how tempted you are, DO NOT give in to the temptation to oversaturate your photographs, unless you're trying to create an abstract art piece. The aim is for the image to encourage interest, not cause people to wonder if you were on an acid trip.
Tip #3: Use the Rule of Thirds for Main Subject
The Rule of Thirds is a composition technique that, apart from the "diagonal principle" helps you decide where to position all the main objects in your scene.
The Rule of Thirds helps to balance your scene by dictating that you position your main objects slightly off-center within the frame. Simply put your viewfinder in grid mode and you'll see a grid of nine squares. All you have to do is place your main subject in the position where the grid lines intersect.

One thing about the rule of thirds is that once you start using it often, it becomes almost second-nature. You'll instinctively know when your images look off balance and you'll also know how to add that extra element and where to add it.
Tip #4: When In Doubt, Lead the Viewer
Instead of trying to be subtle, go full throttle with the use of leading lines. This is especially effective when taking a shot of a beaten path, a pier, or even a railway line.

Leading lines create depth by implying to the reader that your photograph is one of an adventure that they should be taking. It adds scale because the human eye will naturally follow the line way into the distance.
This perspective leads the viewer from the foreground way into the horizon into something called a "vanishing point". This helps you create a story.

Which leads us to our next tip...
Tip #5: Frame your main object
You don't have to be subtle about your focal point if the scene is either busy or unbalanced. If you think of your iPhone's screen as a blank canvas, you'll know that every image needs a frame.
This iPhone landscape photography tip is also in line with the diagonal principle in that you'll be using objects in the foreground to frame objects in the middle ground, and then using objects in the middle ground to frame objects in the background. Each and every object in your scene needs to have a healthy interaction with the next.

Framing your main object automatically provides viewers with some level of context so that they have an understanding of where you were and what you were doing. This technique isn't subtle at all, but it's definitely effective!
With these tips and some imagination, you'll be on your way to becoming a self-certified professional iPhone landscape photographer.
Check out our full line of iPhone photography cases, including the Crio, Sheild Link, Pro.
Why should DSLR photographers have all the fun? Taking incredible photos has never been easier with simply your iPhone and a Hitcase.
Leave a comment
Comments will be approved before showing up.


How strong is your iPhone case?
We make the world's most protective iPhone cases, lenses and mounts, so your iPhone can go everywhere you do. Free USA/CA shipping over $50.
Shop iPhone Cases Now