
6 iPhone Photography Tips to Help You Capture Better Images
There's an old photography saying that goes: the best camera is the one you have with you. Shutterbugs also know that in photography, as well as in life, time and place are everything. Capturing those serendipitous moments that cross your path is quite possibly the number one use case of an iPhone, especially when it's always by your side.
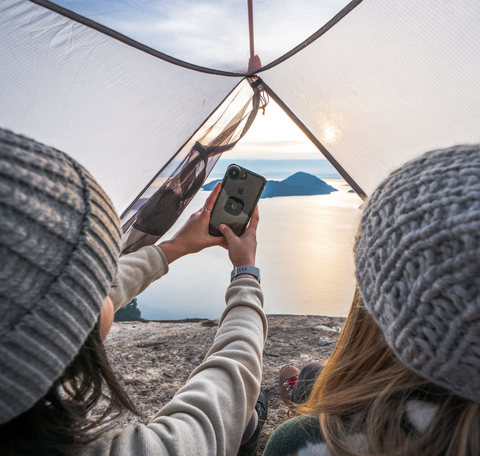
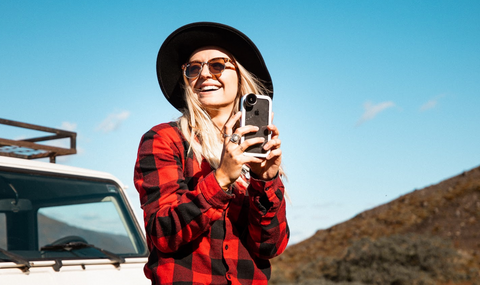
Sure, you could lug a complicated and heavy DSLR around with you, but you'll also need extra batteries, various lenses, and other assorted accessories to keep your rig running hour after hour under different circumstances. But because iPhone photography is quickly closing the gap with professional cameras, you now have the option of leaving your complicated kit at home to rock an iPhone for most, if not all, of your modern-day photography needs. Indeed, not only are most images across social media captured with an iPhone but more and more professional photographers are turning to the iPhone for its intriguing form factor and ease of use. Not to mention that pesky little detail of always having it.
Furthermore, recent improvements mean that iPhone cameras are now better than ever -- rivaling even the best point-and-shoots and giving DSLRs a run for their money, both in feature set and price. But when you spend your money on an iPhone, you also get an advanced computer that can take, edit, and share images in just a few quick steps without any extra dependencies or hardware.
So, without further ado, here are six iPhone photography tips to help take your mobile photography game to the next level.
1. Quickly launch the iPhone camera
When the time is right, you may only have seconds to pull out your iPhone, launch the camera app and hit the shutter before the moment disappears forever. More than anything else, being able to quickly pull up the camera app will help you take better photos because it all starts with being in the right place at the right time.
But for most, grabbing your phone, unlocking it, navigating to the home screen, finding the camera app and pressing it is an eternity in the world of spontaneous iPhone photography. Miss your opportunity by just a second or two and you may as well skip the ritual of another blurry or too-late snap.
The good thing is that there's a way to skip the camera-launch dance, and it requires just one swipe. From the lock screen, simply swipe from left to right (or up from the bottom on older models) and the camera app will automatically open. Additionally, if your iPhone has 3D touch, you can also hard-press the camera app from the lock screen to enter the app.

2. Explore the modes
All those options at the bottom of the iPhone camera app aren't just for decoration -- they're camera modes, and knowing when to use one mode over another is key to becoming an accomplished iPhone photographer.
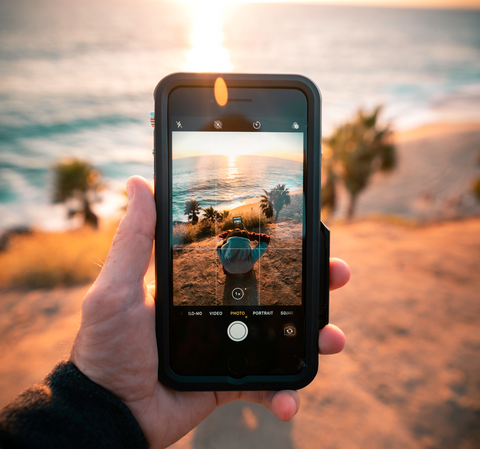
The default mode is Photo, which is great for vertical and horizontal images and is the mode you'll be spending most of your time in due to its maximum flexibility.
The iPhone also has a few video modes. Video shoots normal, regular-time video, while Slo-mo and Time-lapse speed up or slow down your captured video for unique and interesting clips that are great for TikTok, YouTube, and other video sharing sites. That said, sometimes the best photo is a video, and knowing when to switch over can mean the difference between a lackluster snap and a compelling, short video.
Portrait mode adds depth-of-field to your images, which can help highlight the subject and minimize background intrusion. It's also the only way you're going to get tasteful bokeh or blur in your normal shots, though third-party lenses like our TrueLUX Macro lens can achieve a natural bokeh in any mode, including video.
There's also Square mode, which crops all pictures to a perfect square, making it great for social media or if you want to give tight boundaries to a symmetrical image for emphasis.
Lastly, there's Pano, short for panoramic, which enables a wider field-of-view than is natively possible by requiring you to physically pan your phone during a timed shot. Due to artifacts, you might be better off cropping a taller image, but in the right situation, Pano can work wonders. Alternatively, you can try a wide-angle lens for iPhone photography or fisheye lens for iPhone.
3. Auto mode doesn't always work
In iPhone photography, auto mode is your friend. But it doesn't always work. If you're shooting in sub-par lighting conditions -- either too little light, too much harsh light or under unnatural or mixed lighting such as indoors -- your images can end up too dark, too bright or develop an undesirable, yellowish hue.
If you've ever dealt with a washed out or overly dark image when you pull up the camera app, try using your finger to pick a lighter or darker spot in the frame while you're composing your picture. This allows you to balance out the light and dark areas to better suit the composition, which can work wonders if, say, you have a bright window behind an indoors subject. Just keep picking different points in the frame until you land on something you like.
If you press and hold in the frame, you can also slide up and down to adjust brightness, or hit the F button (or the three circles for older models) at the bottom or top of the camera app if you want to make other manual changes. Just remember that a little bit goes a long way, and you can always further edit your images on your phone later.
4. Don't forget distance and angles
Sometimes the biggest change in the quality of your iPhone photography comes from trying out different angles, vantage points, and fields-of-view. The easiest way to do this is to physically move. Get closer if you want a more intimate shot, and move further away to create a sense of space. You can also use your camera's zoom to move in and out, but note that digital zoom decreases image quality as you zoom in, so rely on it only as a last resort if you're unable to move closer.
Additionally, instead of always shooting everything from a normal, head-height perspective, try giving high and low angles a try. You never know what'll work until you give it a shot, and you just might stumble upon something new and inspiring.
Other ways to change things up include iPhone accessories such as a selfie stick or our new iPhone camera lens clip, which allows you to attach one of three iPhone camera lenses -- a wide, superwide and macro -- giving you even more ways to be creative.
5. Brace yourself against camera shake
Because iPhones are so thin and light, they can be tricky to keep still for those super-sharp landscape shots that always seem to develop some kind of fuzziness. And if you're moving around or zoomed in, forget it -- you're headed for blur city.
One option is to grab a standard tripod and our TiltR tripod mount, but there are ways to avoid shake even if you'd like to stay handheld. The first is to make sure you're using both hands; only using one hand for your iPhone photography is a surefire way to lose most of your pictures to inadvertent shakes. Another trick is to tuck your elbows in against your body to further stabilize your arms, or you can also add a third point of contact with your face or your body. The more contact points, the better -- even leaning against a doorway or a railing can give you just enough to capture sharper photos.
But by far the biggest culprit of shaky iPhone photos is tapping the digital capture button on the screen. Instead, try pressing the volume button when you're ready to take a photo. The tactile feedback and button location will likely enable you to take a more stable photo, even one-handed.
6. Take many photos
If you want to have your iPhone photography stand out online, you'll have to practice. If you need to take one picture, take 10 or 50. If you need 50, take 200. Not only will you get better as you take more pictures, but when it comes time to pick just the right one, you'll have more to choose from. The nice thing is that as you go through your shots, you'll learn what worked, what needs work, and what you may not want to work on again.
Additionally, because you can fit thousands of pictures on your iPhone before you run out of space -- and you can always offload pictures to a computer, an external drive or upload them to the cloud -- there's no excuse for not taking more pictures. Sure, you'll have more to do on the curation and editing side, but more options mean more opportunities to find what you're looking for -- or even to be pleasantly surprised by something you didn't plan or anticipate.
Yes, it can be a daunting thing to look through hundreds of photos after just an afternoon of shooting, but you can always delete later, and you'll never have the opportunity to look at or judge a picture you never took.
From your friends at Hitcase
Here at Hitcase, we believe that iPhones live at the center of our digital lives. But they're not just devices to interact with friends and family and to practice iPhone photography with -- your phone is the way you interact with the world, and the way in which you capture and share your world with others. So with how much time and energy we spend on and with our phones, it's a frightening thought that just one clumsy moment can send your delicate device to the cold hard ground below. If you're unlucky, it means a trip to the Apple store to pick up a replacement, or living with cracks and other blemishes. With a Hitcase, such as this iPhone XS Max protective case, you're covered, and the peace of mind you get with a protective Hitcase means you'll never have to worry about going phoneless ever again. Go Hitcase!
Leave a comment
Comments will be approved before showing up.


How strong is your iPhone case?
We make the world's most protective iPhone cases, lenses and mounts, so your iPhone can go everywhere you do. Free USA/CA shipping over $50.
Shop iPhone Cases Now